Installation
- Install Mini Conda on your Windows/Mac/Linux machine. Download ‘Miniconda3 64 bit’ for your platform here and install it:https://docs.conda.io/en/latest/miniconda.html
- Start a new Miniconda command prompt (Anaconda prompt) via Windows start menu or Linux bash terminal:
- Let’s install a new Python environment:
conda create -n py36 python=3.6
4. Now activate the created environment:
conda activate py365. Now you can install OpenCV Python libraries:
conda install -c anaconda opencv
pip install opencv-python
pip install numpy
First OpenCV example
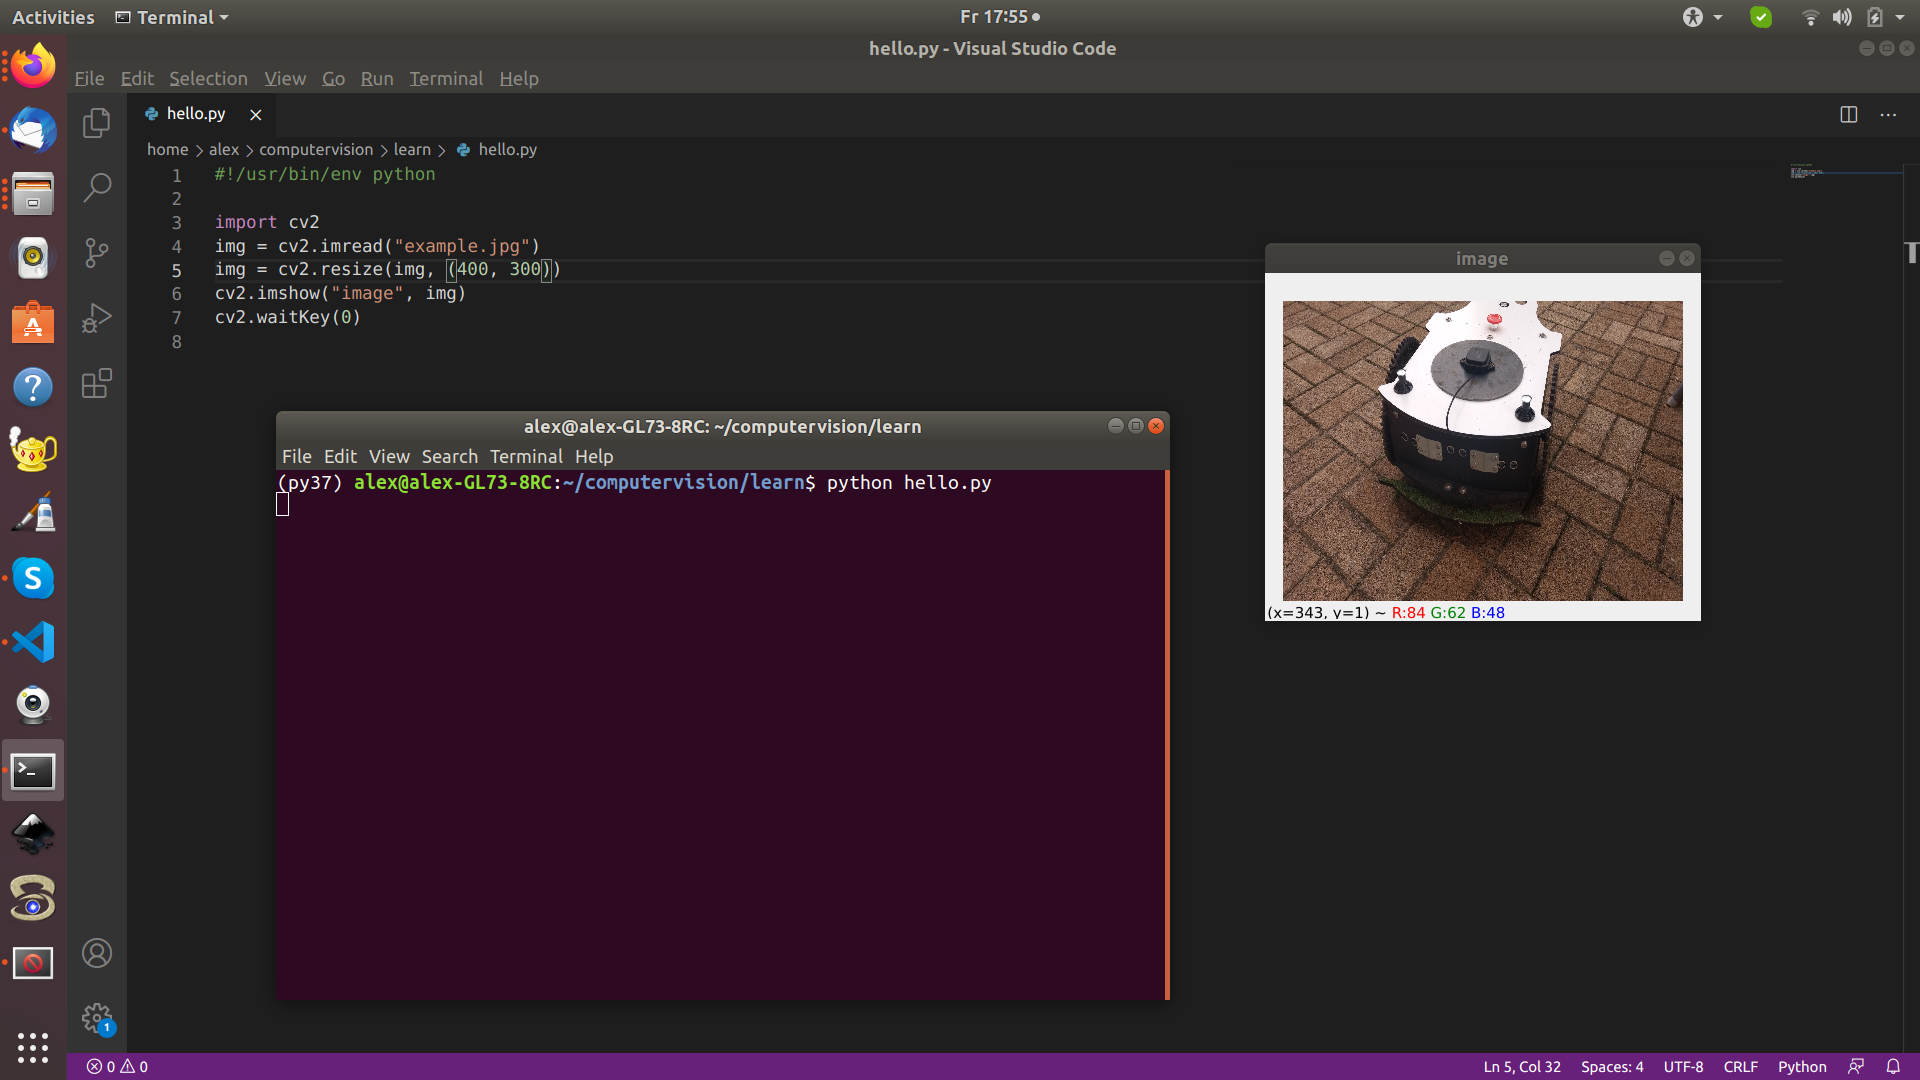
Using some text editor (e.g. Visual Studio Code), create some text file ‘hello.py’ and type in:
import cv2
img = cv2.imread("example.jpg")
cv2.imshow("image", img)
cv2.waitKey(0)
The example will use some JPG file as input and display it on the screen.
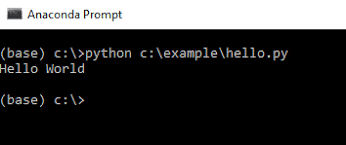
Run the example with:
python hello.py
Filtering images by color
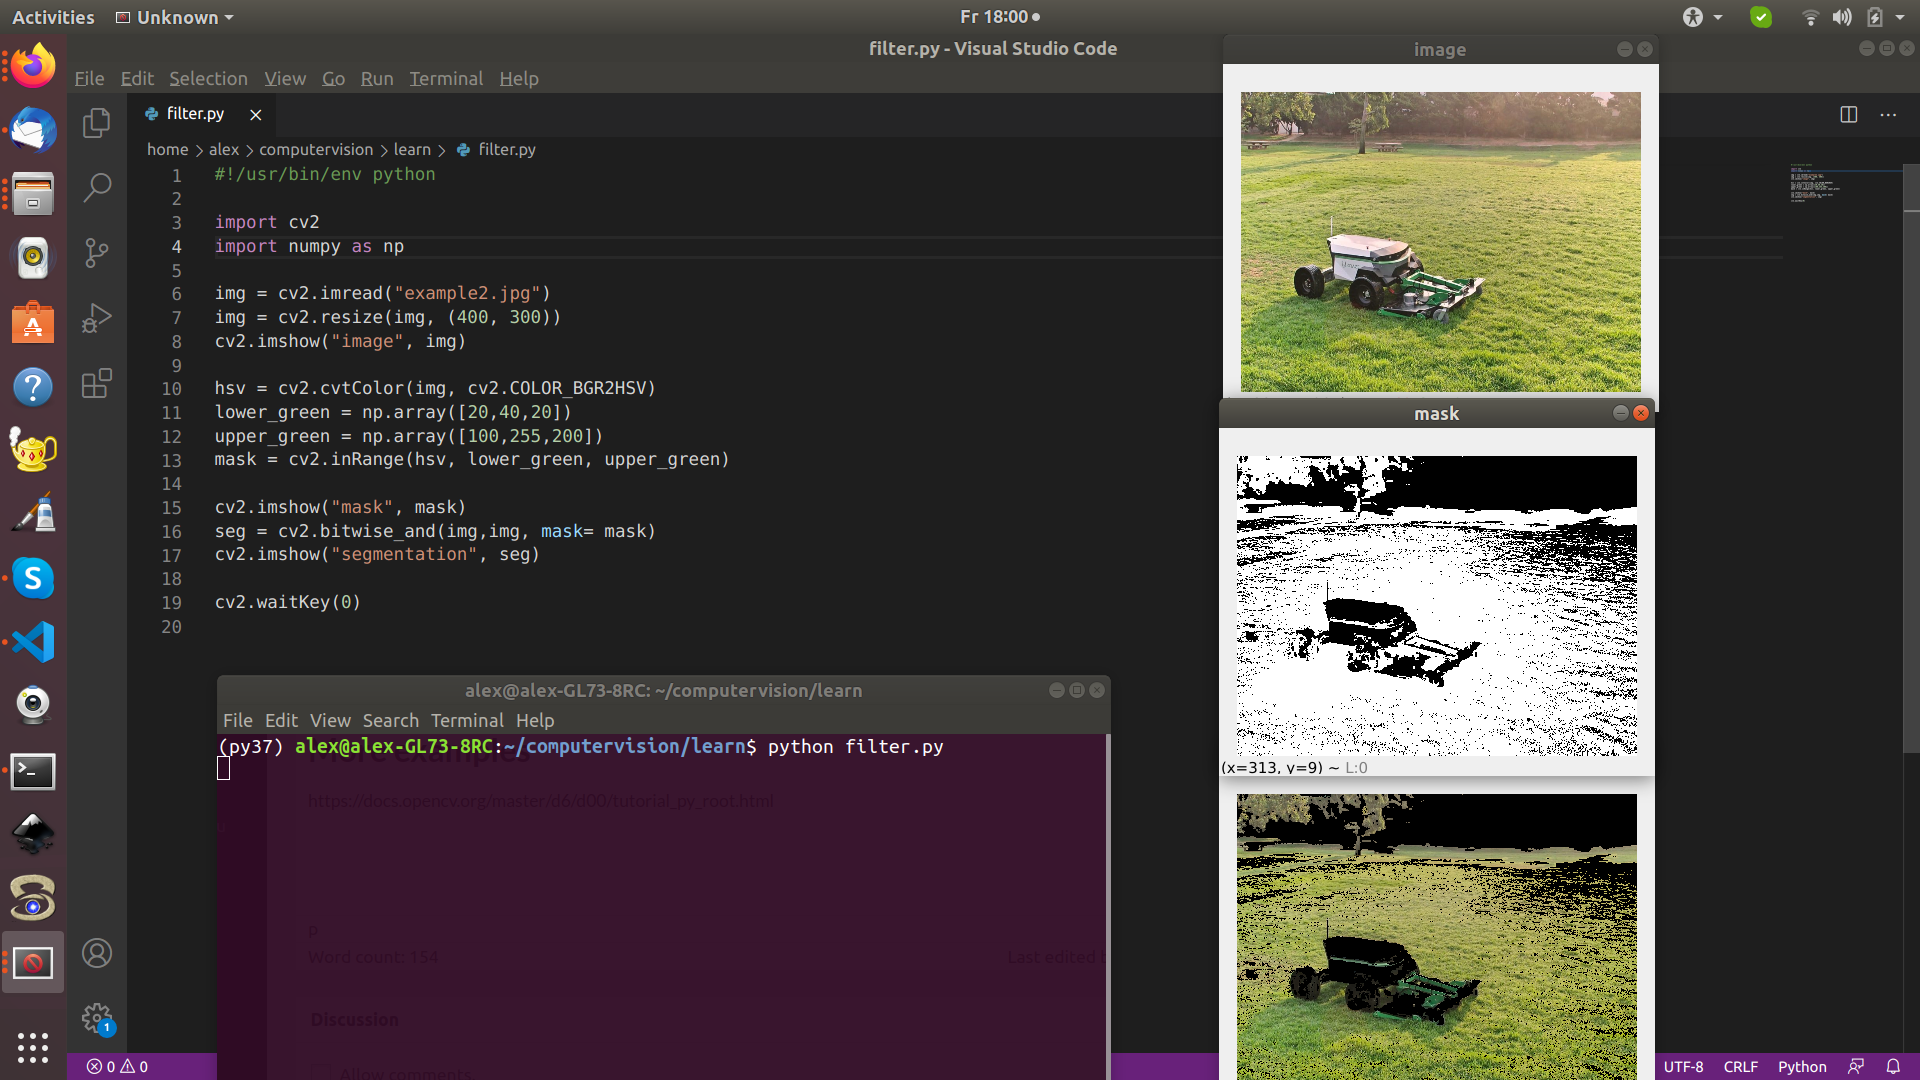
We will transform an RGB image to HSV color space and then filter all green pixels in the HSV color space.
import cv2
import numpy as np

# ----read and show image-----
img = cv2.imread("example2.jpg")
img = cv2.resize(img, (400, 300))
cv2.imshow("image", img)
# ----filter by color-----
hsv = cv2.cvtColor(img, cv2.COLOR_BGR2HSV)
lower_green = np.array([20,40,20])
upper_green = np.array([100,255,200])
mask = cv2.inRange(hsv, lower_green, upper_green)
cv2.imshow("mask", mask)

seg = cv2.bitwise_and(img,img, mask= mask)
cv2.imshow("segmentation", seg)

cv2.waitKey(0)
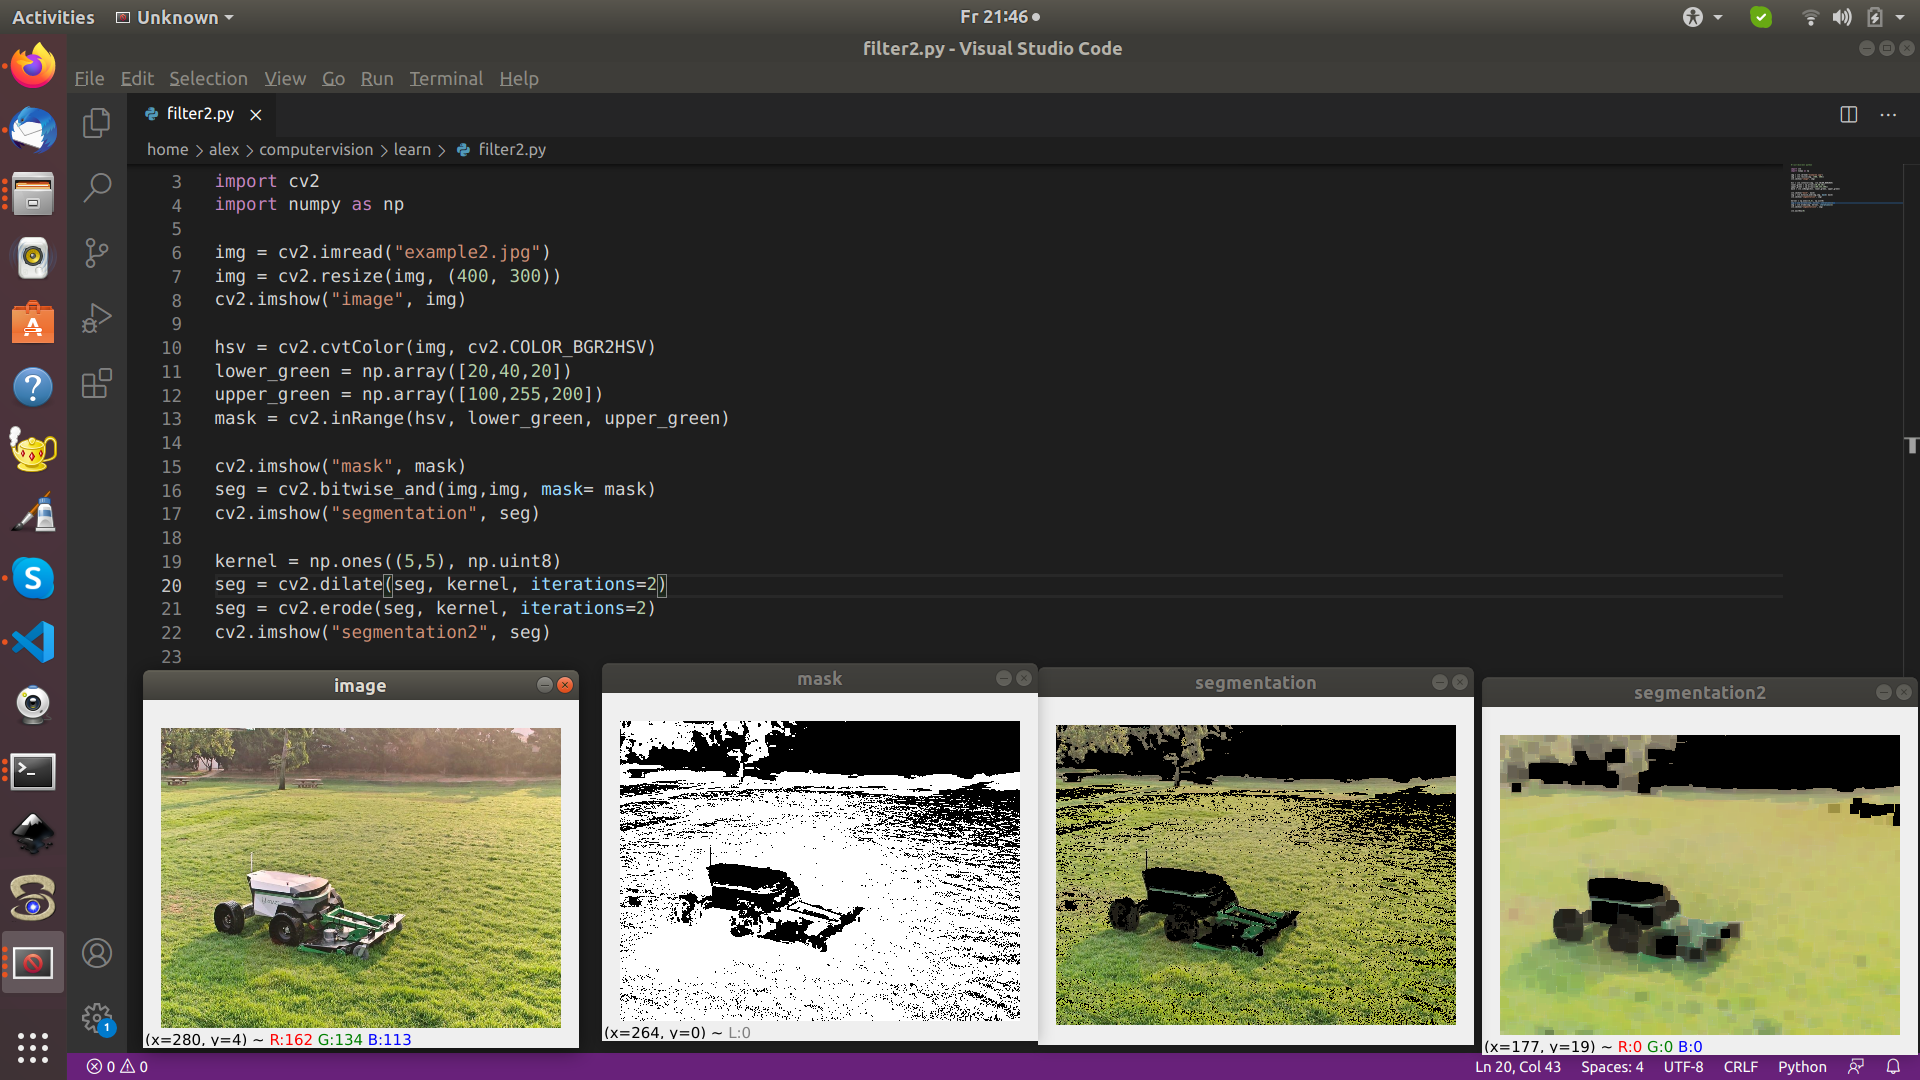
Filling holes
We use the dilate and erode operations to fill in holes:
import cv2
import numpy as np
#----read and show image---
img = cv2.imread("example2.jpg")
img = cv2.resize(img, (400, 300))
cv2.imshow("image", img)
#---- filter by color----
hsv = cv2.cvtColor(img, cv2.COLOR_BGR2HSV)
lower_green = np.array([20,40,20])
upper_green = np.array([100,255,200])
mask = cv2.inRange(hsv, lower_green, upper_green)
cv2.imshow("mask", mask)
seg = cv2.bitwise_and(img,img, mask= mask)
cv2.imshow("segmentation", seg)
#---- fill-in holes------
kernel = np.ones((5,5), np.uint8)
seg = cv2.dilate(seg, kernel, iterations=2)
seg = cv2.erode(seg, kernel, iterations=2)
cv2.imshow("segmentation2", seg)
cv2.waitKey(0)
Using camera as input
Plug-in a USB camera into your computer and run the following code. It will capture one image from the camera and show it on the screen in a loop.
TODO: Add the color filtering code from above example.
import cv2
cam = cv2.VideoCapture(0)
while True:
  ret, img = cam.read()
  cv2.imshow("cam",  img)
  cv2.waitKey(1)
Using video as input
import cv2
cam = cv2.VideoCapture('somevideo.mp4')
while True:
  ret, img = cam.read()
  cv2.imshow("cam",  img)
  cv2.waitKey(1)
Other useful packages
pip install pyrealsense2
pip install apriltag
…
More examples
Tutorials: https://docs.opencv.org/master/d6/d00/tutorial_py_root.html
Code: https://github.com/opencv/opencv
Documentation
Python: https://docs.python.org/3/
OpenCV: https://docs.opencv.org/master/index.html
Miniconda: https://docs.conda.io/en/latest/miniconda.html