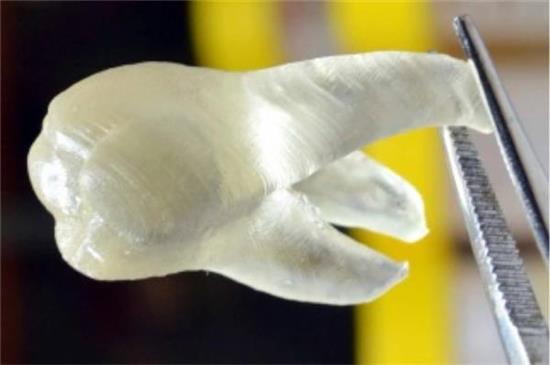
SLA printed tooth
This page describes basic principles of a 3D stereolithography printer. I’m using a LCD SLA printer (Proniks KLD-LCD1260).
Basic principle of a 3D stereolithography apparatus (SLA) printer
A photosensitive suspension (photopolymer resin) is exposed by light (of certain wavelength) so it cures. The exposure pattern for each 3D slice is defined by a 2D photo mask (ultraviolet (UV) laser, UV light projector/DLP or LCD). After a layer is photocured, the Z axis moves up for the next layer of the 3D object. An FEP film clamped against the glass is used as the release layer.
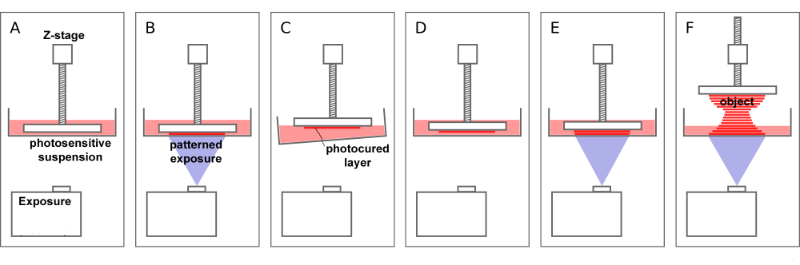
There exist three common photo mask and light source combinations:
- ultraviolet (UV) laser
- Digital light processing (DLP) projector and UV lamp
- LCD panel and UV lamp
The type of photopolymer resin used (visible-light-curing or ultraviolet (UV)-curing) has to match the type of photo mask and light source combination.
Example:
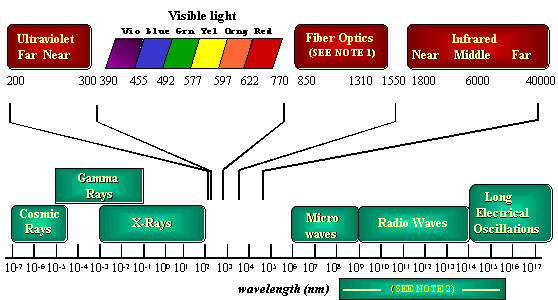
- resin: UV-curing resin with absorption range 250 to 450 nm
- light source: UV lamp/LED 405 nm
- photo mask: LCD panel allowing to pass the UV lamp frequency
Photopolymer resin
Photoinitiators are small molecules that are sensitive to light. Upon light absorption they undergo photochemical cleavage to produce reactive species (either free radicals or a Bronsted or Lewis acid) that will interact with the active components in formulations. In other words, one could say that photoinitiators take the energy from light and transform it into chemical energy to induce chemical reactions. This process where a liquid formulation is transformed into a cross-linked polymer induced by a photoinitiator and its reaction with light is called photopolymerization (also known as radiation curing).
There are 2 classes of photoinitiators: Type I and Type II
- Type I photoinitiators are those that undergo unimolecular bond cleavage after absorption of light to render the reactive species. No other species are necessary in order for these photoinitiators to work.
- Type II photoinitiators undergo a bimolecular reaction. After absorption of light, the photoinitiator reaches excited state from which reacts with another molecule (co-initiator or synergist) to create the reactive species.
Regardless of the photoinitiator used and for a successful cure, it is extremely important that the absorption bands of the photoinitiator will overlap with the emission spectrum of the light source used for curing. Also, there should be minimum competition for light absorption from other species in the formulation. A poor match between absorption bands and light emitted by the source will result in a poor cure or no cure at all.
Free radical photoinitiators are used in the photopolymerization of acrylate or styrene based resins.
Cationic photoinitiators are used to initiate the photopolymerization of epoxy resins.
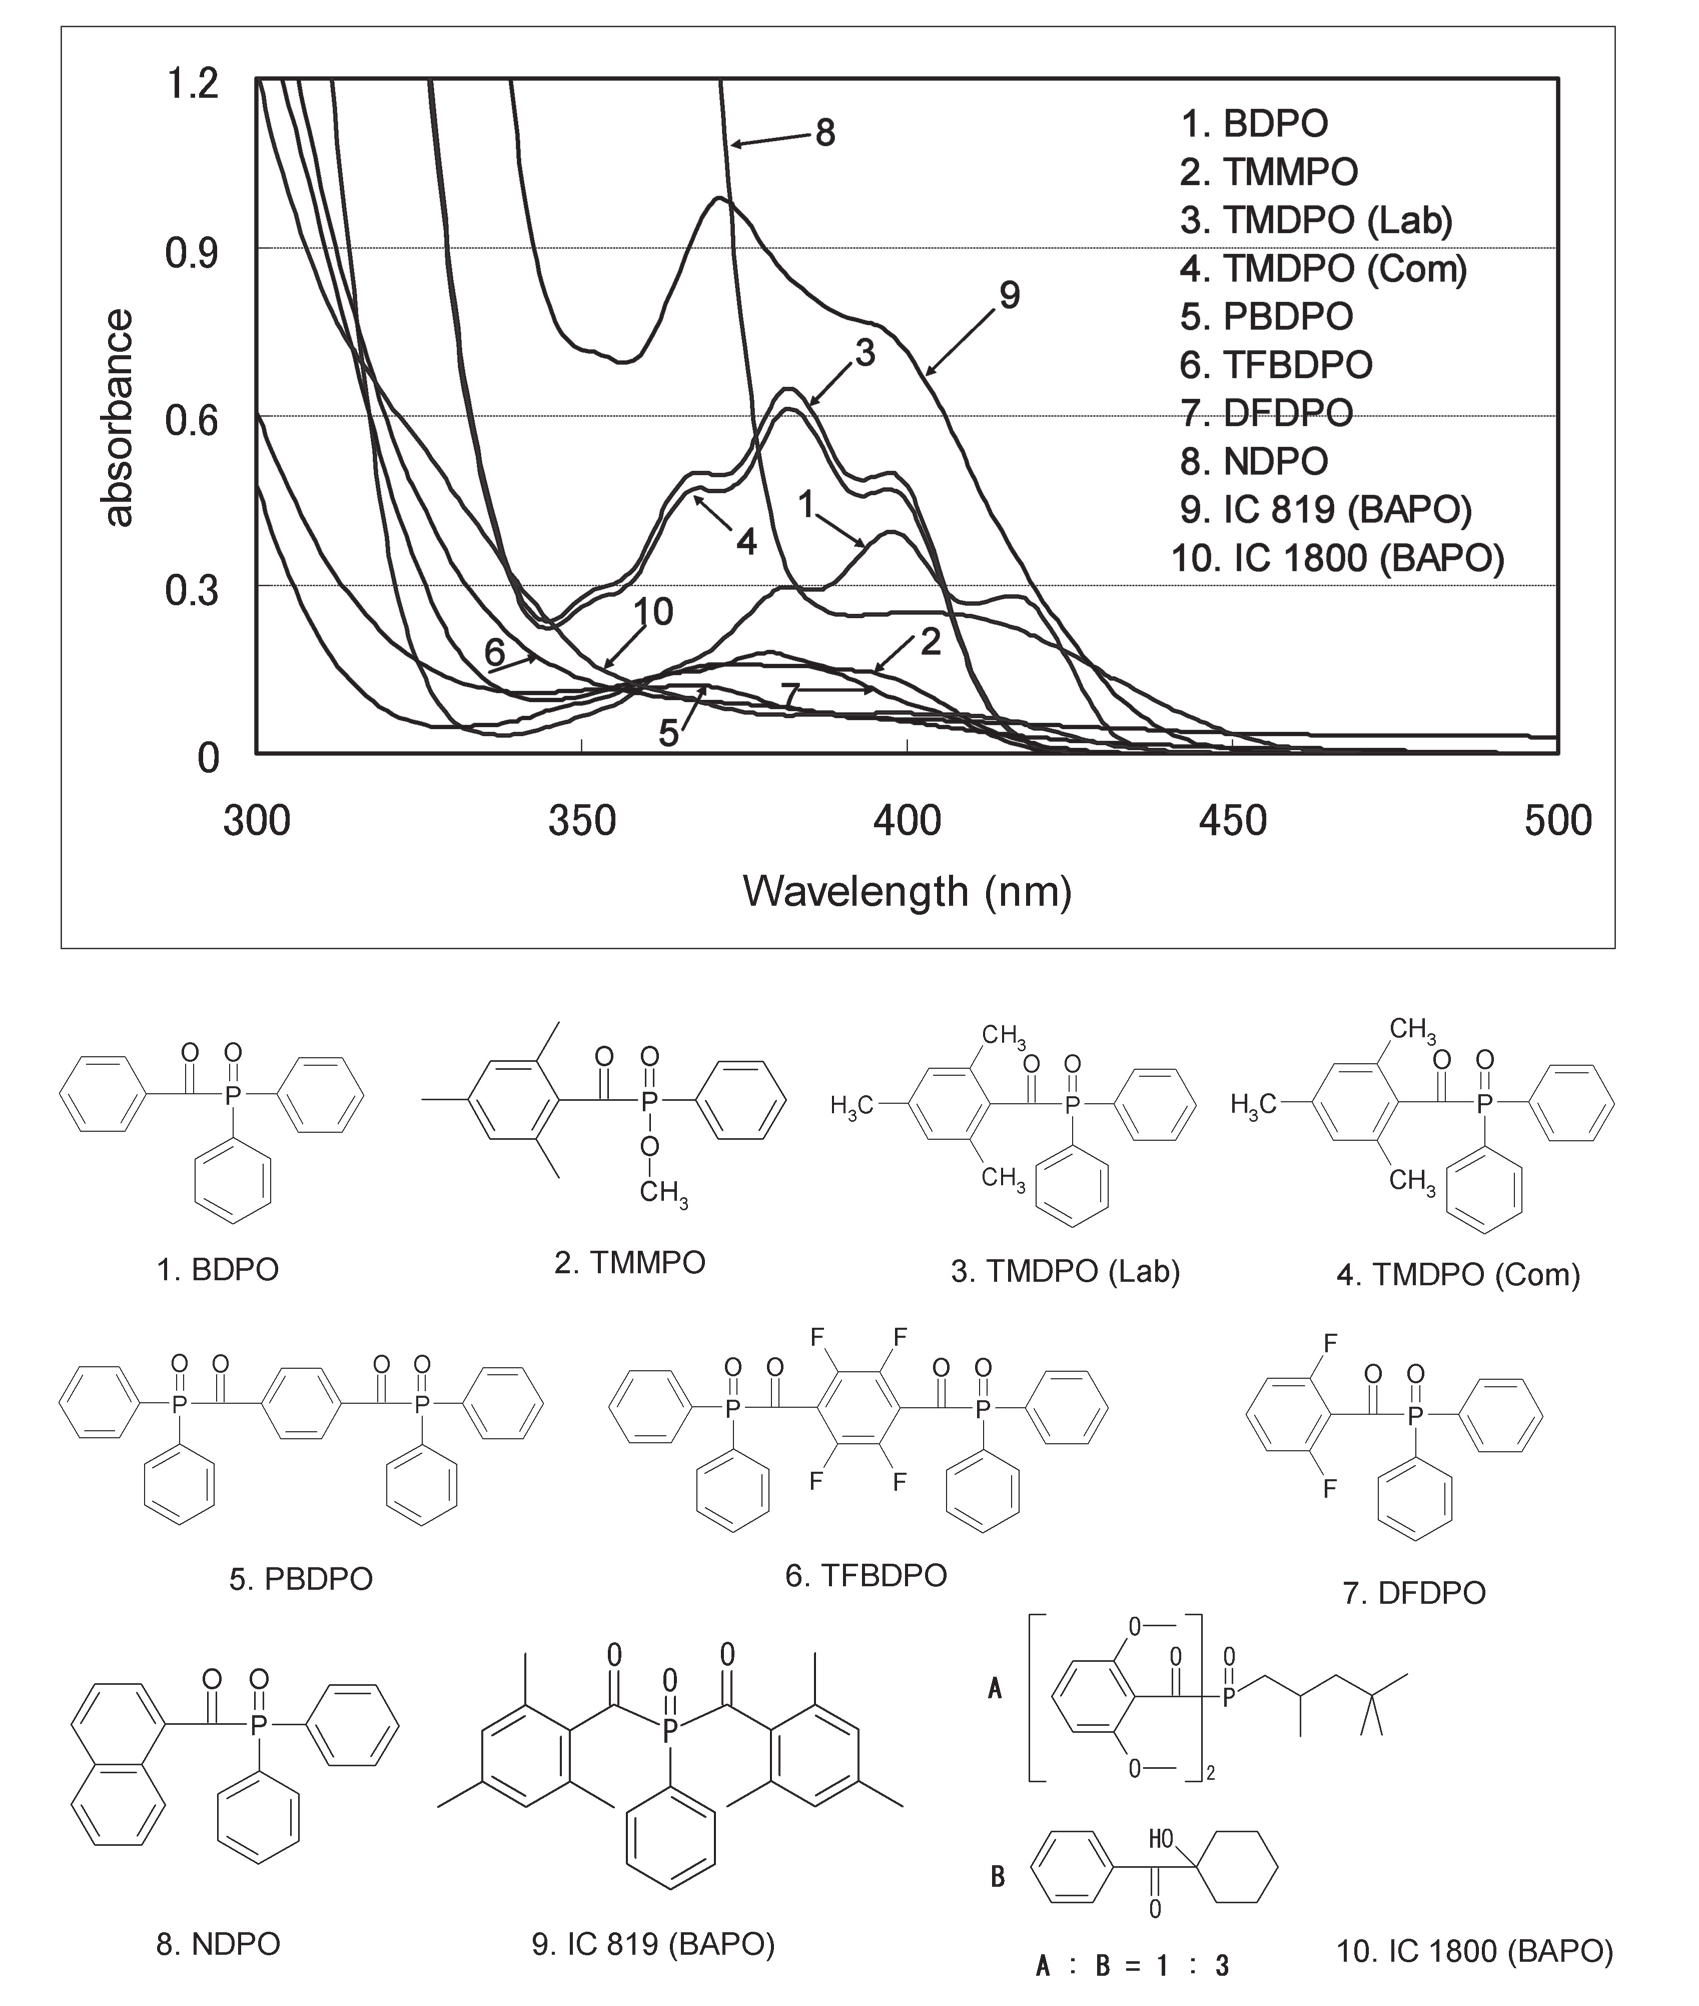
– BAPO: Bis-Acyl-Phosphine Oxide, IRGACURE® 819, Maximum peak adsorption 371, 400 nm, CAS# 162881-26-7
-TMDPO: 2,4,6-Trimethyl benzoyl diphenyl phosphine oxide, Maximum peak adsorption 368, 382, 397 nm, CAS# 75980-60-8
Printer and resin examples
SLA LCD printer (Proniks KLD-LCD1260 / YHD-101, approx. 500 EUR)
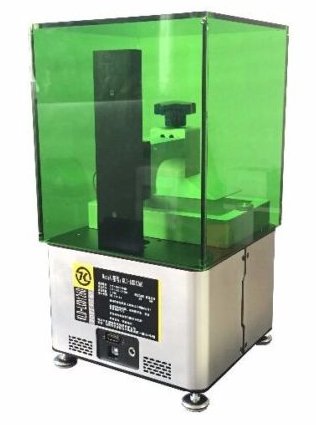
- photo mask: LCD 5.5 inch screen, 1440 x 2560 (537 PPI)
- Light: UV-LED 405 nm
- Print size: 121*68*150mm(XYZ)
- Resolution : 25 micron
- Print layer : 0.035mm-0.1mm
- Print Speed: 15mm-35 mm/Hour
- Resin: LCD/SLA printer resin
- signal input: HDMI
- PCB1: Arduino Mega 2560 (Sprinter firmware) + stepper motor driver
- PCB2: LCD controller (HDMI interface)
printer G-codes (Sprinter firmware):
- G28 home axis
- G1 X0 Y0 Z100 F300 move to position (0,0,100)
- M106 switch UV-LED on
- M107 switch UV-LED off
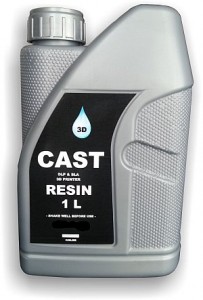
UV-curing resin
- Senertek SNRcast (1 liter approx. 50 EUR)
- UV Absorption range: 250 to 450 nm
- Shrink: 0.2%
- Ash Content: < 0.03%
- Surface Tension: 39.0 Dynes/cm
- Tensile Strength: 10100 PSI, 4% Elongation
- Shore Hardness: 85 D
- Glass Transition Temperature: 82°C
- Water content: < 0.08%
- Viscosity @ 20°C: 50 cP
- Acidity: < 0.15 mg KOH/g
- Density @ 25°C: 1.15 g/cm3
- Store in a tightly closed,in dark at 20- 25 degre celcius
- Shelf-life is 15 months from receipt
2. Bucktown Polymers ZVE200-V470
- Low Viscosity
- Low odor
- Zero VOC Epoxy
- High Performance and tough
- Corrosion resistant
- Cures by UV up to visible blue led, lamp or laser <500nm
- Comaptible with SLA, laser, LCD and DLP 3D printers
- http://bucktownpolymers.com/zve200-v470.html
3. Fun To Do resin
- Curing times of 0.5 seconds for 0.02mm layers are easily achieved on standard Dlp printers with an average light source of around 240Watts
- As long as the wavelength is between 225nm and 415nm, it will work, and it will work fast
- http://www.funtodo.net/our-3d-resin-blends.html
Printing software
RasperryPI – HDMI config (/boot/config.txt):
hdmi_force_hotplug=1

#hdmi_ignore_edid=0xa5000080

disable_overscan=1

framebuffer_depth=24

gpu_mem=192

framebuffer_ignore_alpha=1

#start_x=1

hdmi_cvt=1440 2560 48

hdmi_group=2

hdmi_mode=87

hdmi_pixel_freq_limit=400000000

hvs_priority=0x32ff

max_framebuffer_width=1440

max_framebuffer_height=2560

framebuffer_width=1440

framebuffer_height=2560

config_hdmi_boost=4

#hdmi_timings=1440 0 16 16 64 2560 0 5 2 1 0 0 0 50 0 176947200 3

#hdmi_cvt 2560 1440 50
Further information
- Visible-Light-Curing Resin (Three Bond Technical News, Issued July 1, 1995, – 45)
- Visible-Light-Curing Resin (Three Bond Technical News, Issued July 1, 1995 – 44)
- Photopolymer (Wikipedia)
- http://3dprinter.wikidot.com/photoactive-resins
- https://en.wikipedia.org/wiki/Photoinitiator
- http://bucktownpolymers.de/de/mixing-tutorials-de/buck-mix-de/
- OpenSLA – Build Your Own SLA Resin 3D Printer
- http://www.khwelling.nl/3d.dlp_printer.php
Nice summary of info Thanks
Hi,
I used your settings in the config.txt. However the screen is portrait, not landscape. Any ideas?
Methods tried:
1. Display_rotate =1 (screen not fully function)
2. I tried to swap 1440×2560 in NanoDLP projector settings, but still portrait.
3. I tried to change LCD timing (seems doesn’t help)
I think the screen is portrait not landscape in default. Do you have any idea to make it landscape?
Thanks,
I just order from web this printer. Please let me know what is a good resin for a jeweller like me to be able to do casting with the method of lost wax ?
Thank you .
Could you post what exposure times you are using for your resins? Thanks!