This tutorial covers:
- 3D world, robot and sensor simulation (360 degree LiDAR, depth camera) with gazebo and turtlebot
- 2D mapping with gmapping
- 2D localization with amcl
- 3D mapping with octomap
- 3D localization with humanoid_localization
- Writing a Python-based robot move controller
A small taste 🙂 (NOTE: video shows some early trials without further tuning…)
Requirements:
- Ubuntu ROS 14.04.3 or later
- ROS Indigo or Kinetic
- for 3D SLAM: fast CPU (something like i7-4790 CPU, 3.6 Ghz x 8)
Why simulation? If your idea doesn’t work in simulation, it will not work in reality at all 😉
1) Download and setup
Download my tutorial files and extract them to your home folder (~/catkin_ws/src/…): https://drive.google.com/open?id=1NtF2NFOGf9EggCGFjO9FyXdfi7efdqL0
Add something like this to the end of your .bashrc (~/.bashrc) – NOTE: order is important:
source /opt/ros/indigo/setup.bash
source /home/alex/catkin_ws/devel_isolated/setup.bash
Run this in a new terminal and verify the ROS folders now are included:
echo $ROS_PACKAGE_PATH
It should show something like this:
/home/alex/catkin_ws/src/turtlebot/turtlebot_teleop:/home/alex . . . :/opt/ros/indigo/share:/opt/ros/indigo/stacks
Run in terminal to verify everything is working correctly:
roscd sim
It should go into the ‘catkin_ws/src/sim’ folder. You are now prepared for ROS 🙂
2) Make the code
Go into the ‘catkin_ws’ folder and run in terminal to make the code (this will take a while):
catkin_make_isolated
It should complete without errors (in red). If you get an linker error on ‘octovis/extern/QGLViewer’, please delete that folder.
If you get an error ‘sbpl not found’:
- cd ~/catkin_ws/src/sbpl
- rm -R build
- mkdir build
- cd build
- cmake ..
- make
- sudo make install
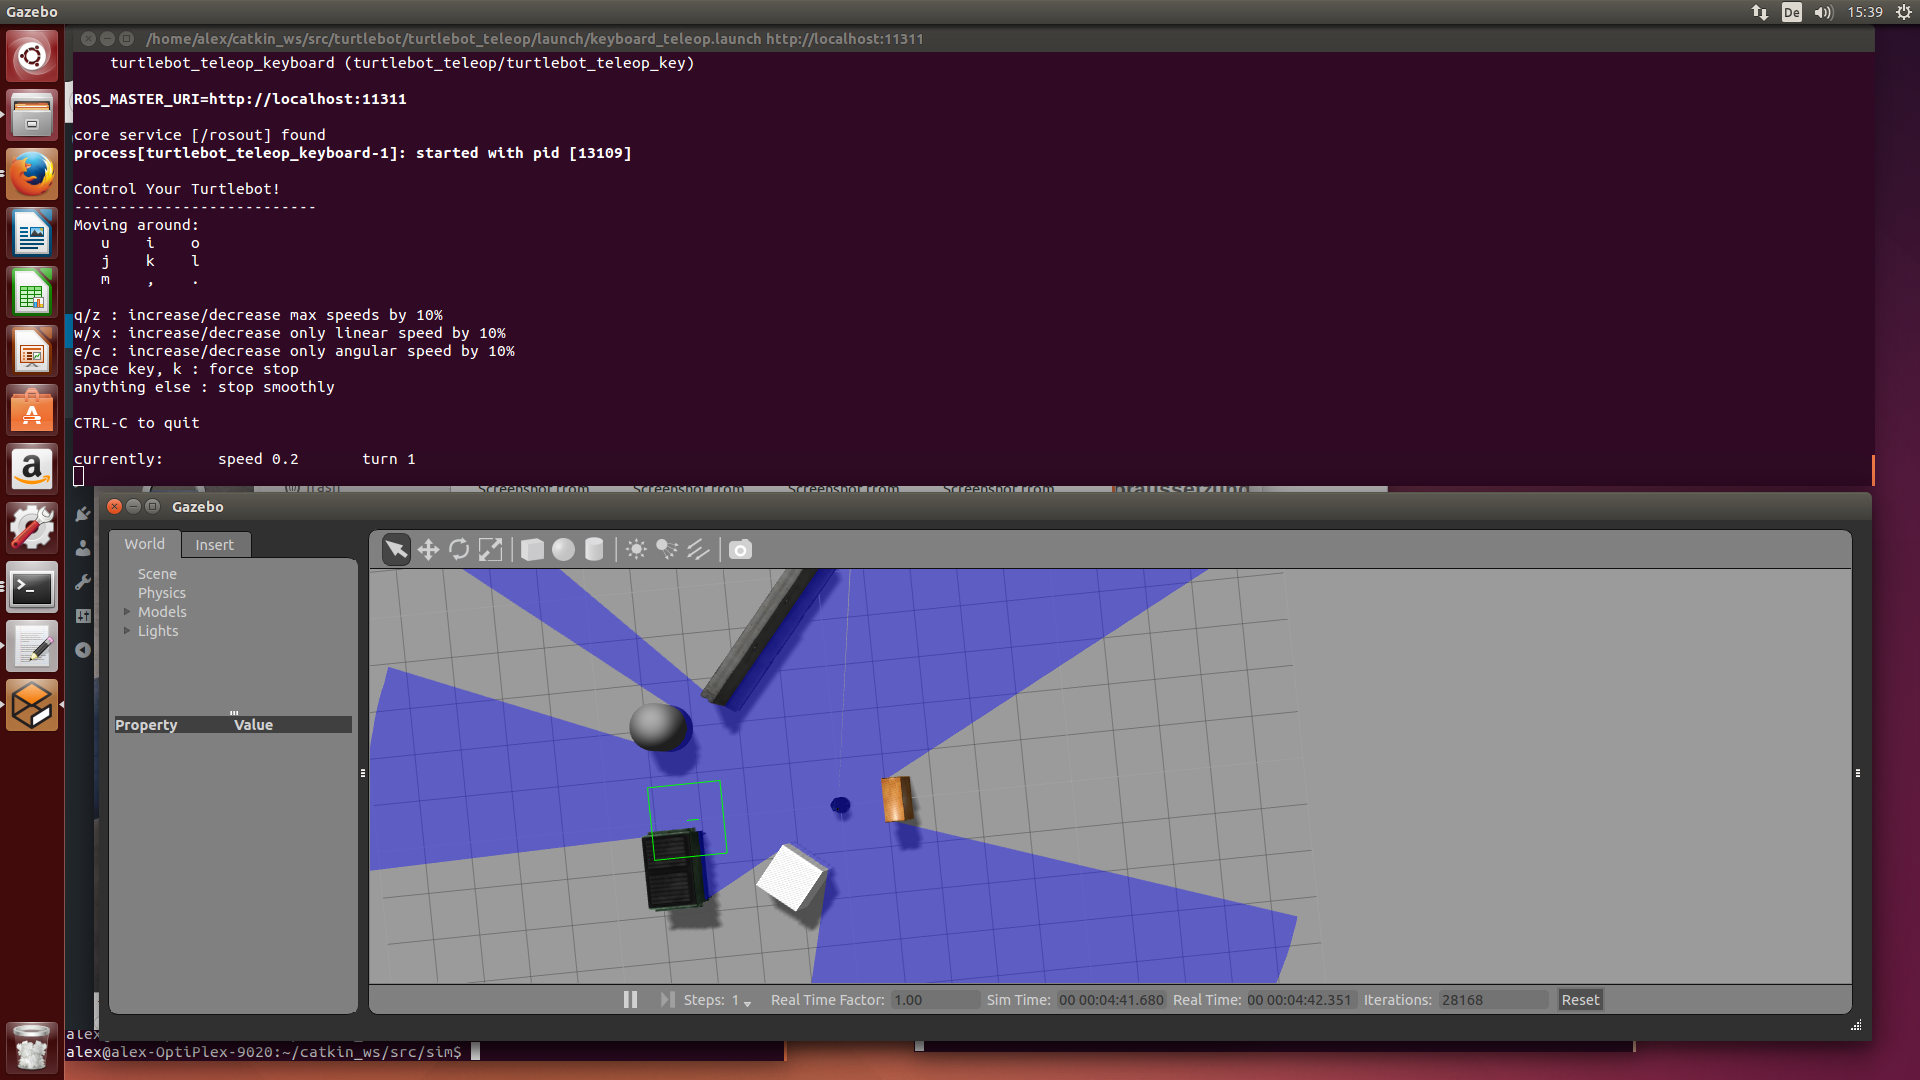
3) The world and robot simulation
Run gazebo with turtlebot in a new terminal:
roslaunch sim turtlebot_world.launch
Run turtlebot teleop keyboard in a new terminal:
roslaunch turtlebot_teleop keyboard_teleop.launch
Play with the keys (u,i,o, etc.) to find out how to steer the robot (NOTE: always activate this terminal window for steering the robot)
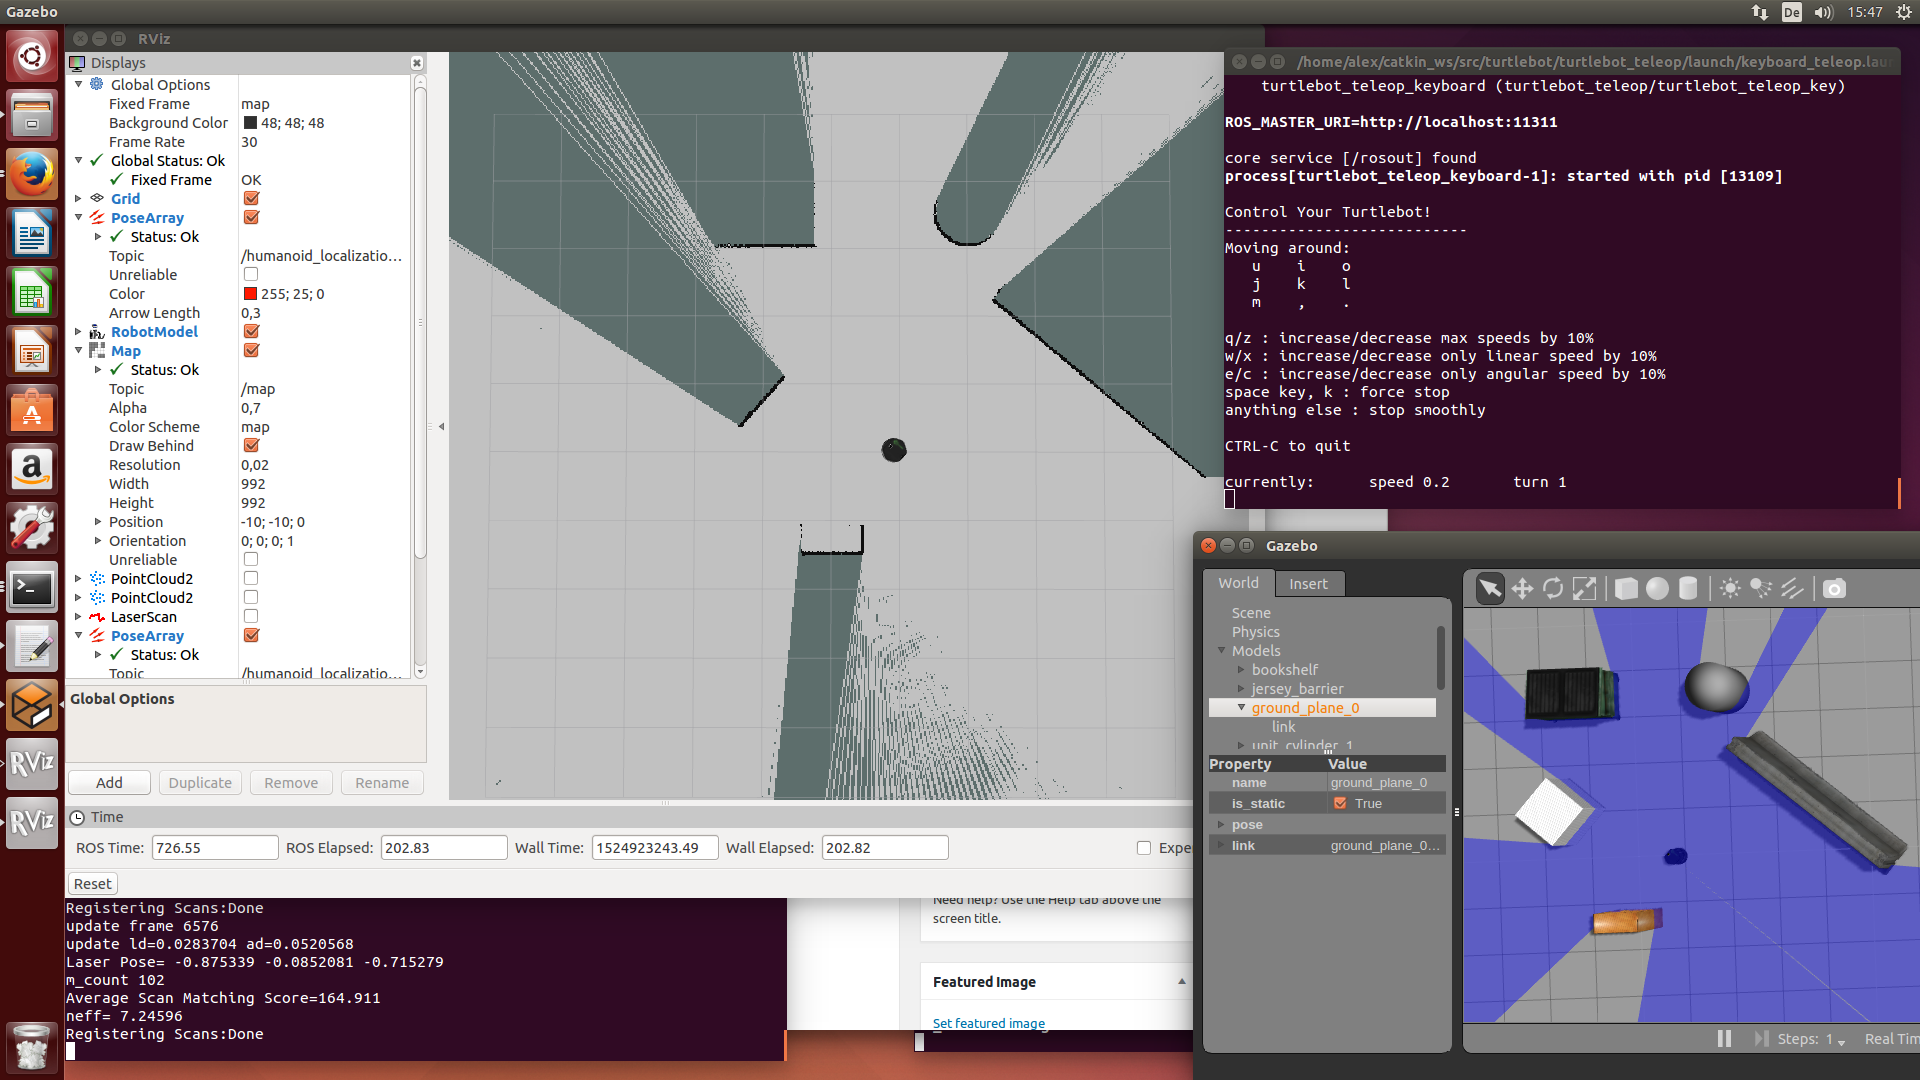
4) Mapping in 2D with 360 degree LiDAR
Run gmapping in a new terminal:
roslaunch sim gmapping.launch
In RViz make sure Fixed frame is ‘map’, and ‘Map’ topic is ‘/map’.
Steer the robot around to assemble the map.
To save the map, run this in a new terminal:
roscd sim
rosrun map_server map_saver -f gmap
Finally, press CTRL+C in terminal to stop gmapping.
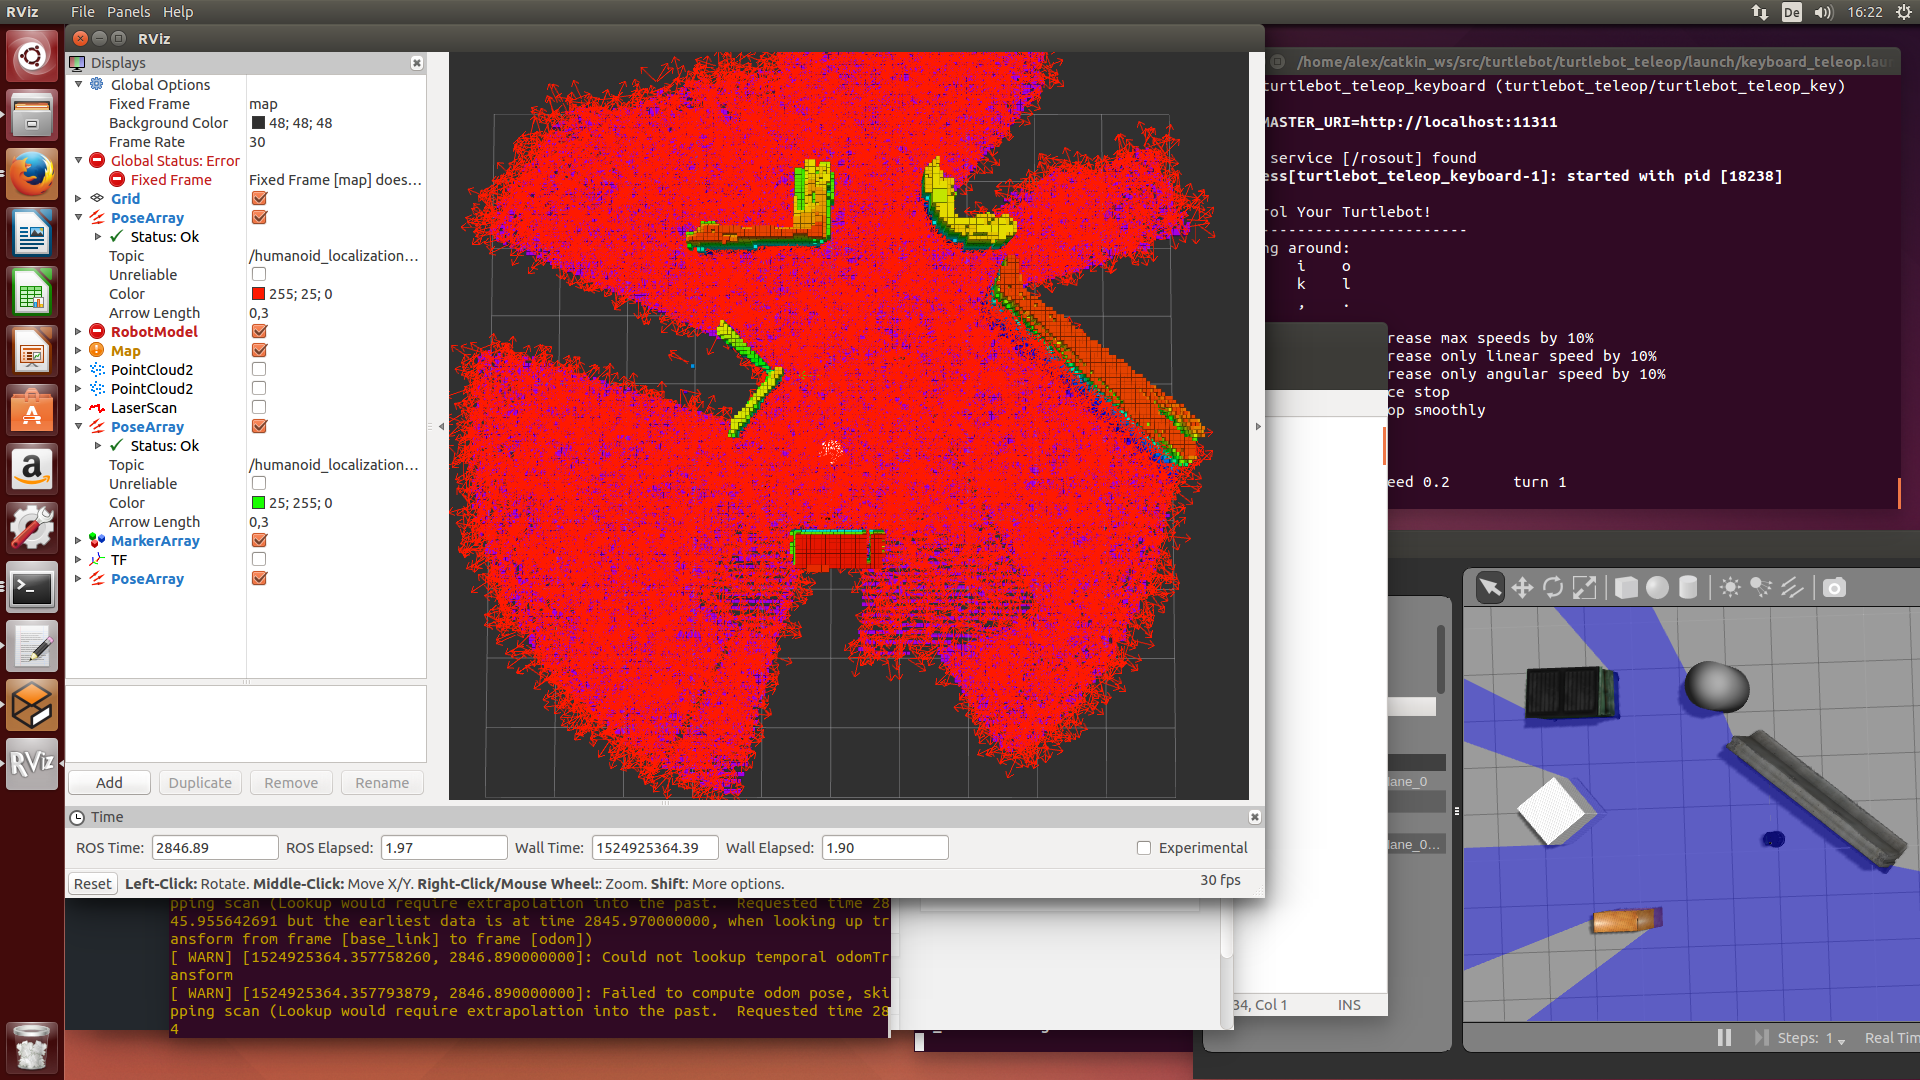
5) Localization in 2D with 360 degree LiDAR
We will now use your saved map for localization.
Run ‘amcl’ in terminal
roslaunch sim amcl.launch
In RViz make sure Fixed frame is ‘map’, and ‘Map’ topic is ‘/map’.
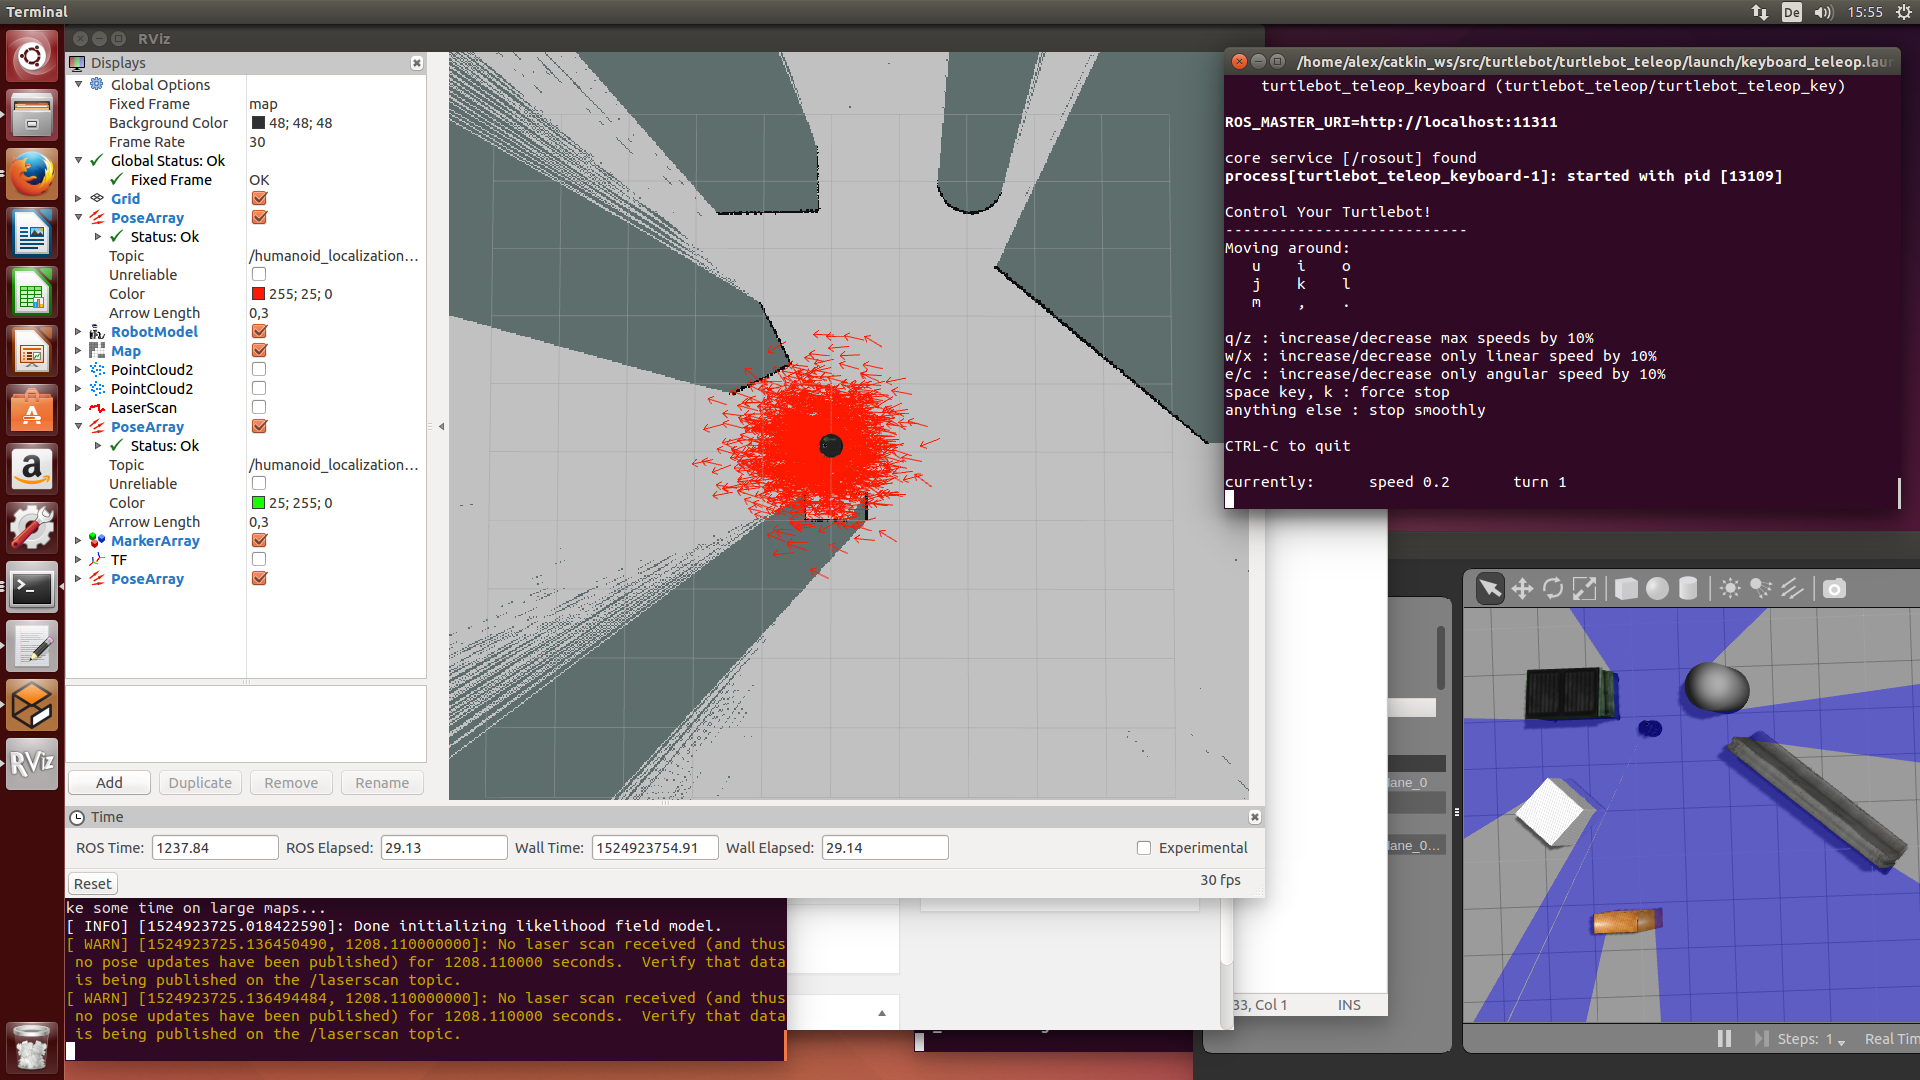
Because our robot actually is far away from the particles, the particle filter will not be able to find the real position. Therefore we will perform a ‘global localization’ to distribute the particles all over the map. Run in terminal:
rosservice call /global_localization
Now steer the robot around. The particles that do not fit to the sensor measurements will be thrown away until finally the particles of the real position survive. Now new particles will be added near the surviving particles to find out a changing position when the robot moves. The center of all particles is the estimated localized position.
Press ‘CTRL+C’ in terminal to stop the localization.
6) Mapping in 3D with depth camera (point cloud)
Run in terminal to start octomap:
roslaunch sim octomap.launch
If you get an error (octomap_server not installed), try this: sudo apt-get install ros-indigo-octomap* )
In RViz, make sure Fixed frame is ‘base_link’.
NOTE: If the octomap is not showing in rviz, edit the file catkin_ws/src/sim/octomap.launch and remove the line that contains a ‘remap TF’ statement.
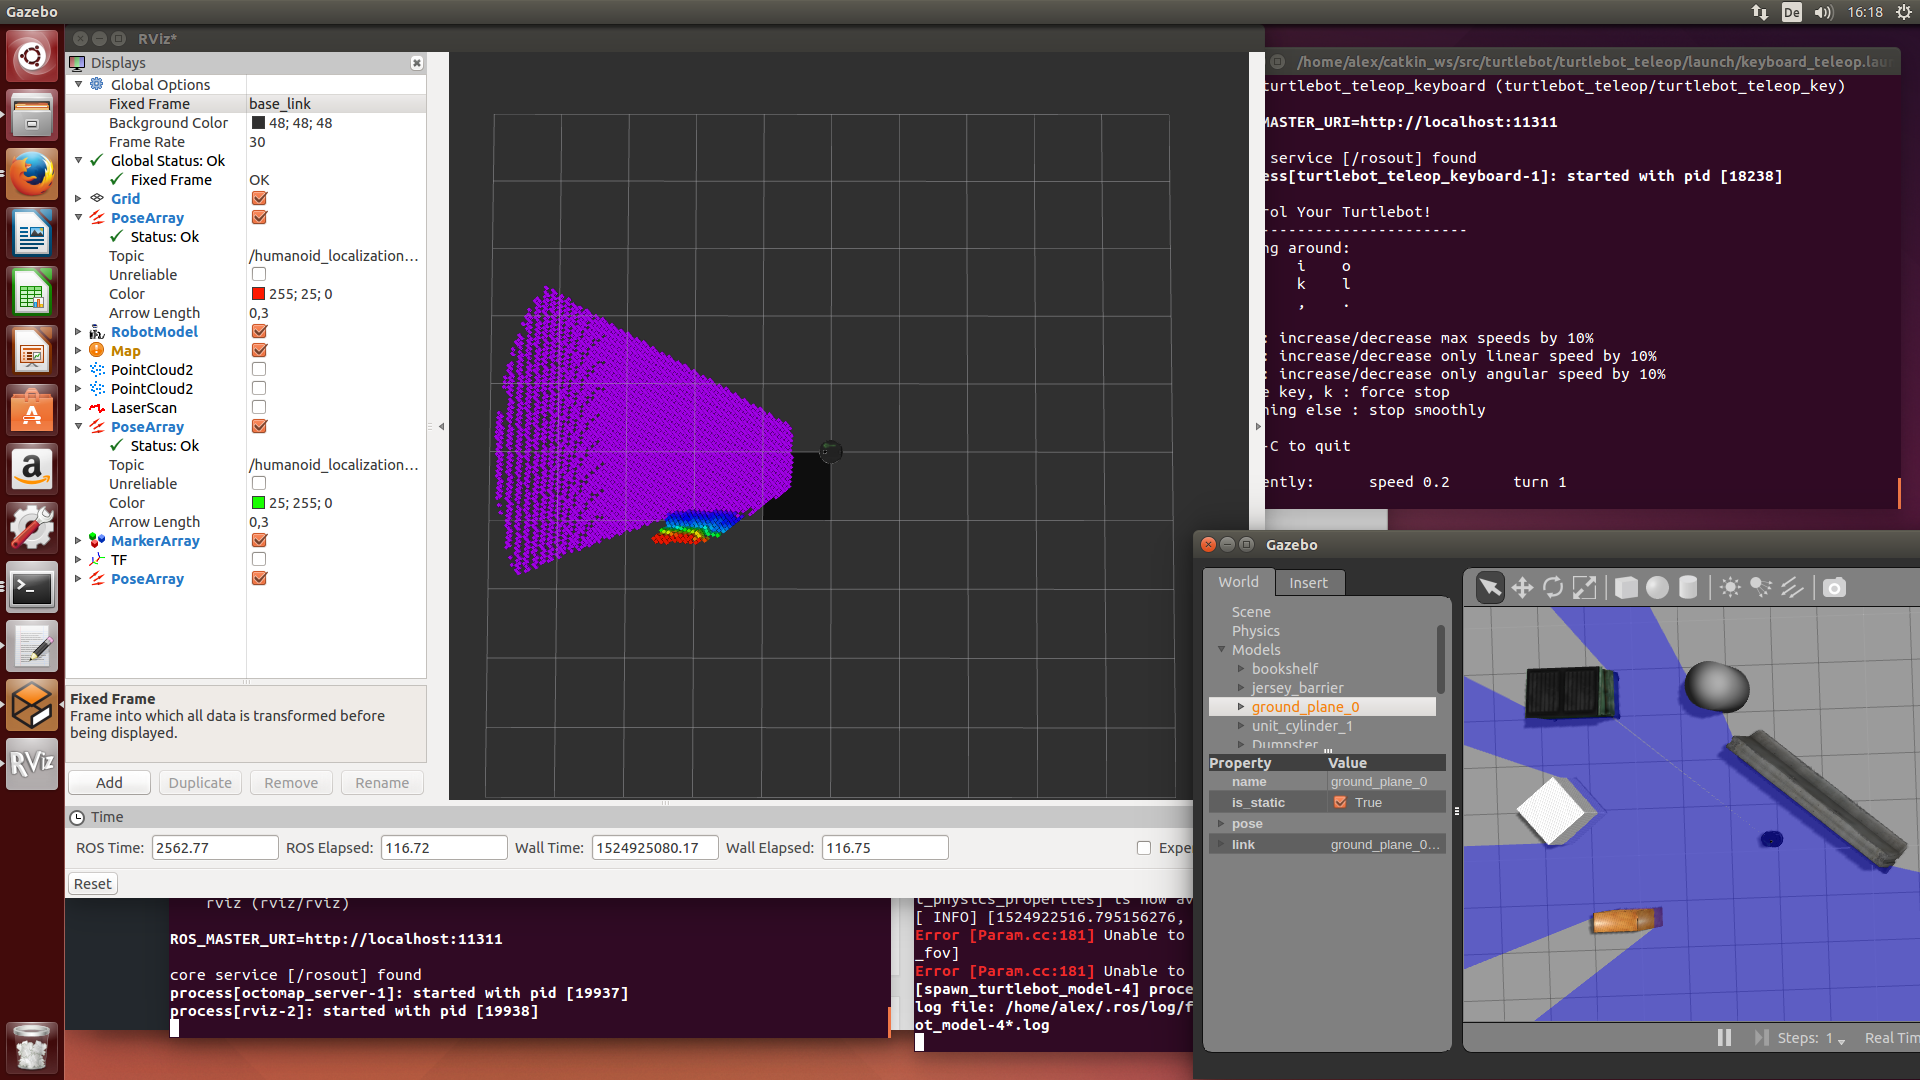
Now rotate the robot until the 3D map is assembled.
NOTE: octomap_server is not a complete mapping solution, for best results one should add another (visual) odometry solution.
Finally, save the map:
roscd sim
rosrun octomap_server octomap_saver map.bt
Press ‘CTRL+C’ in terminal to stop the mapping.
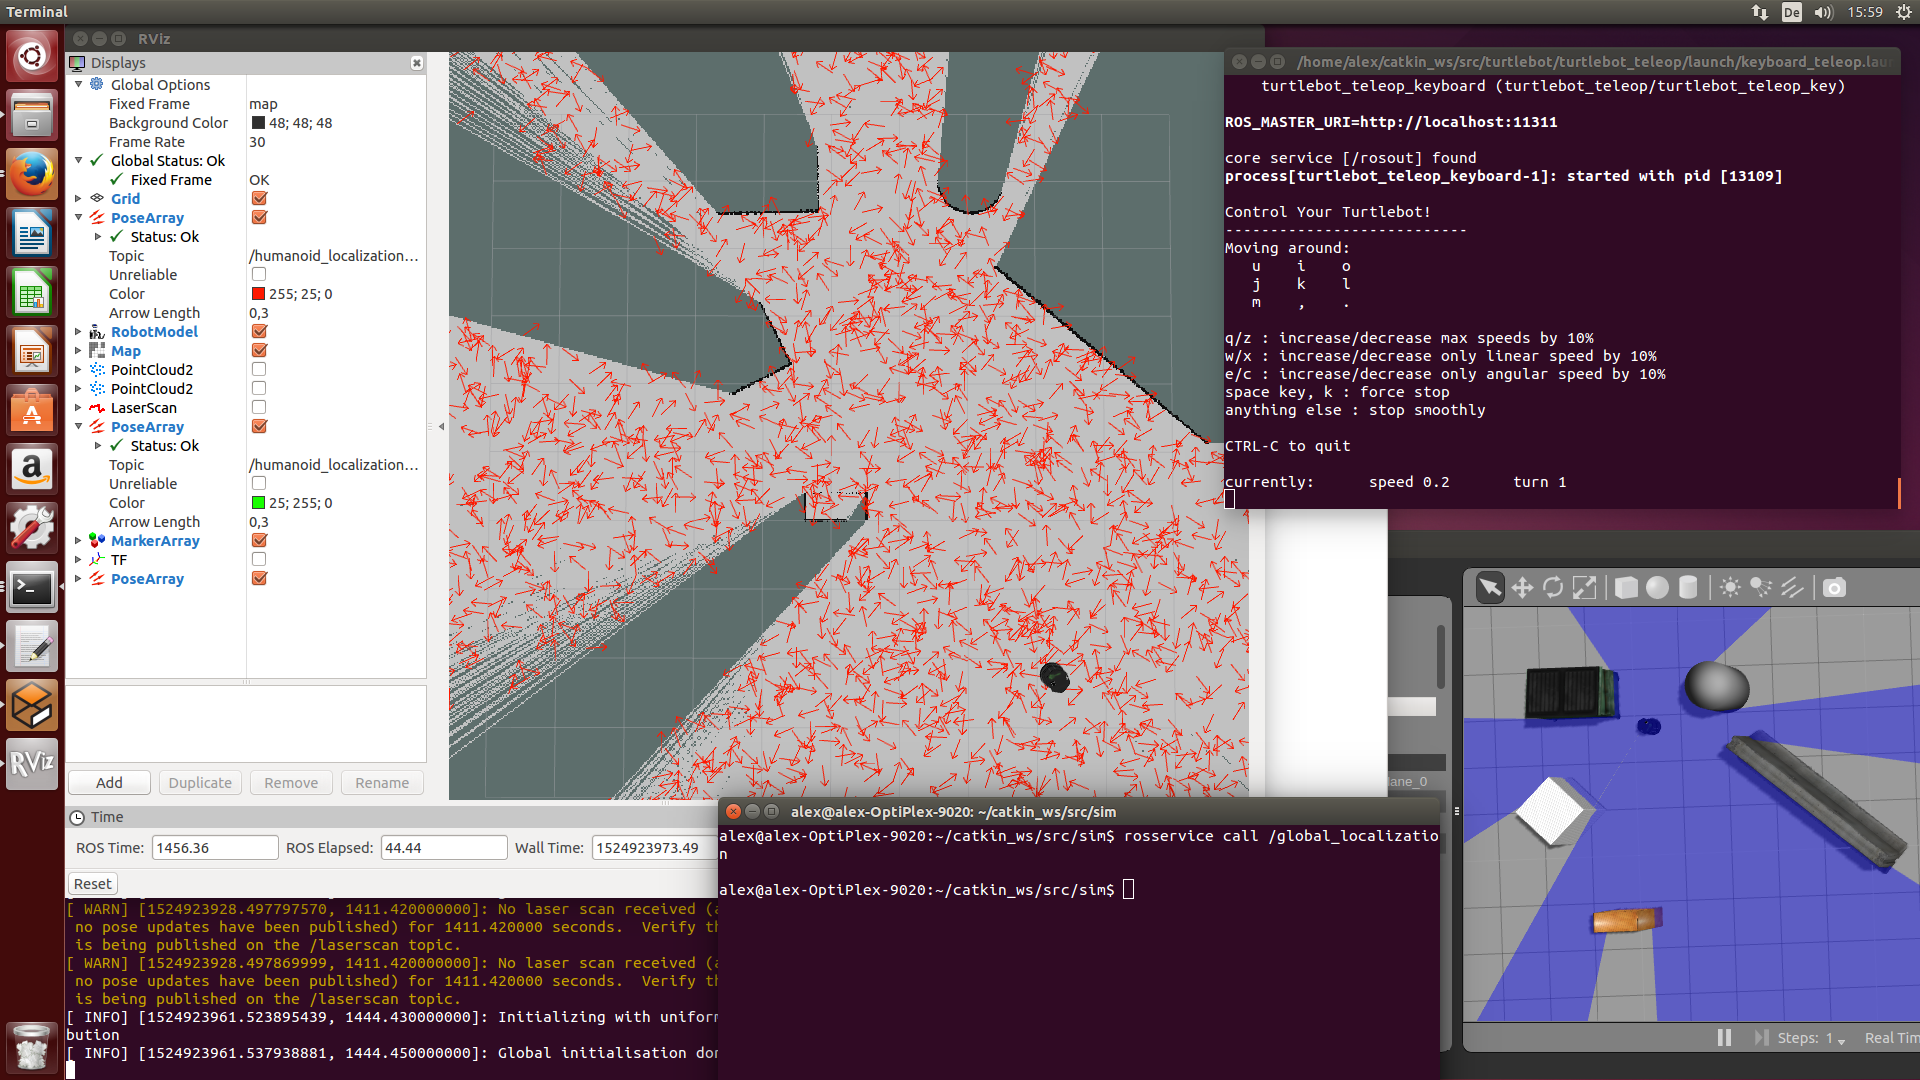
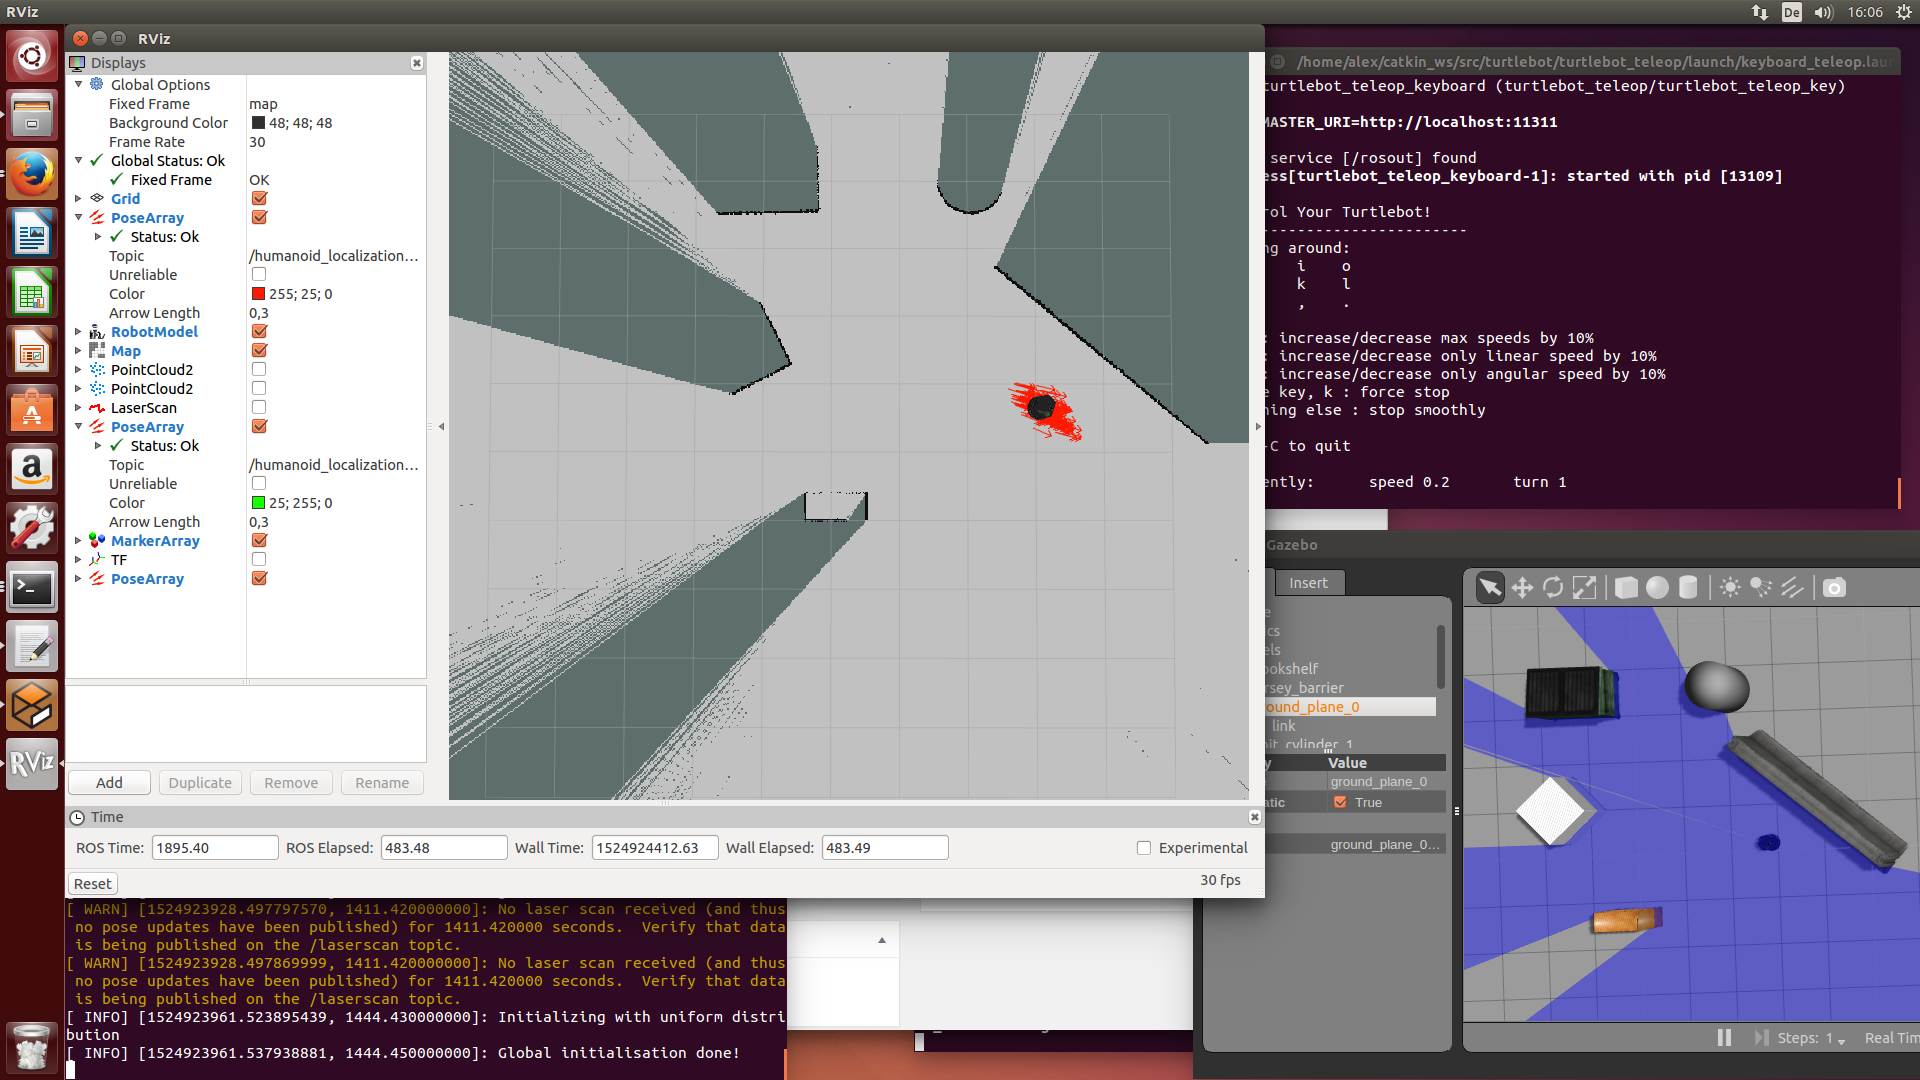
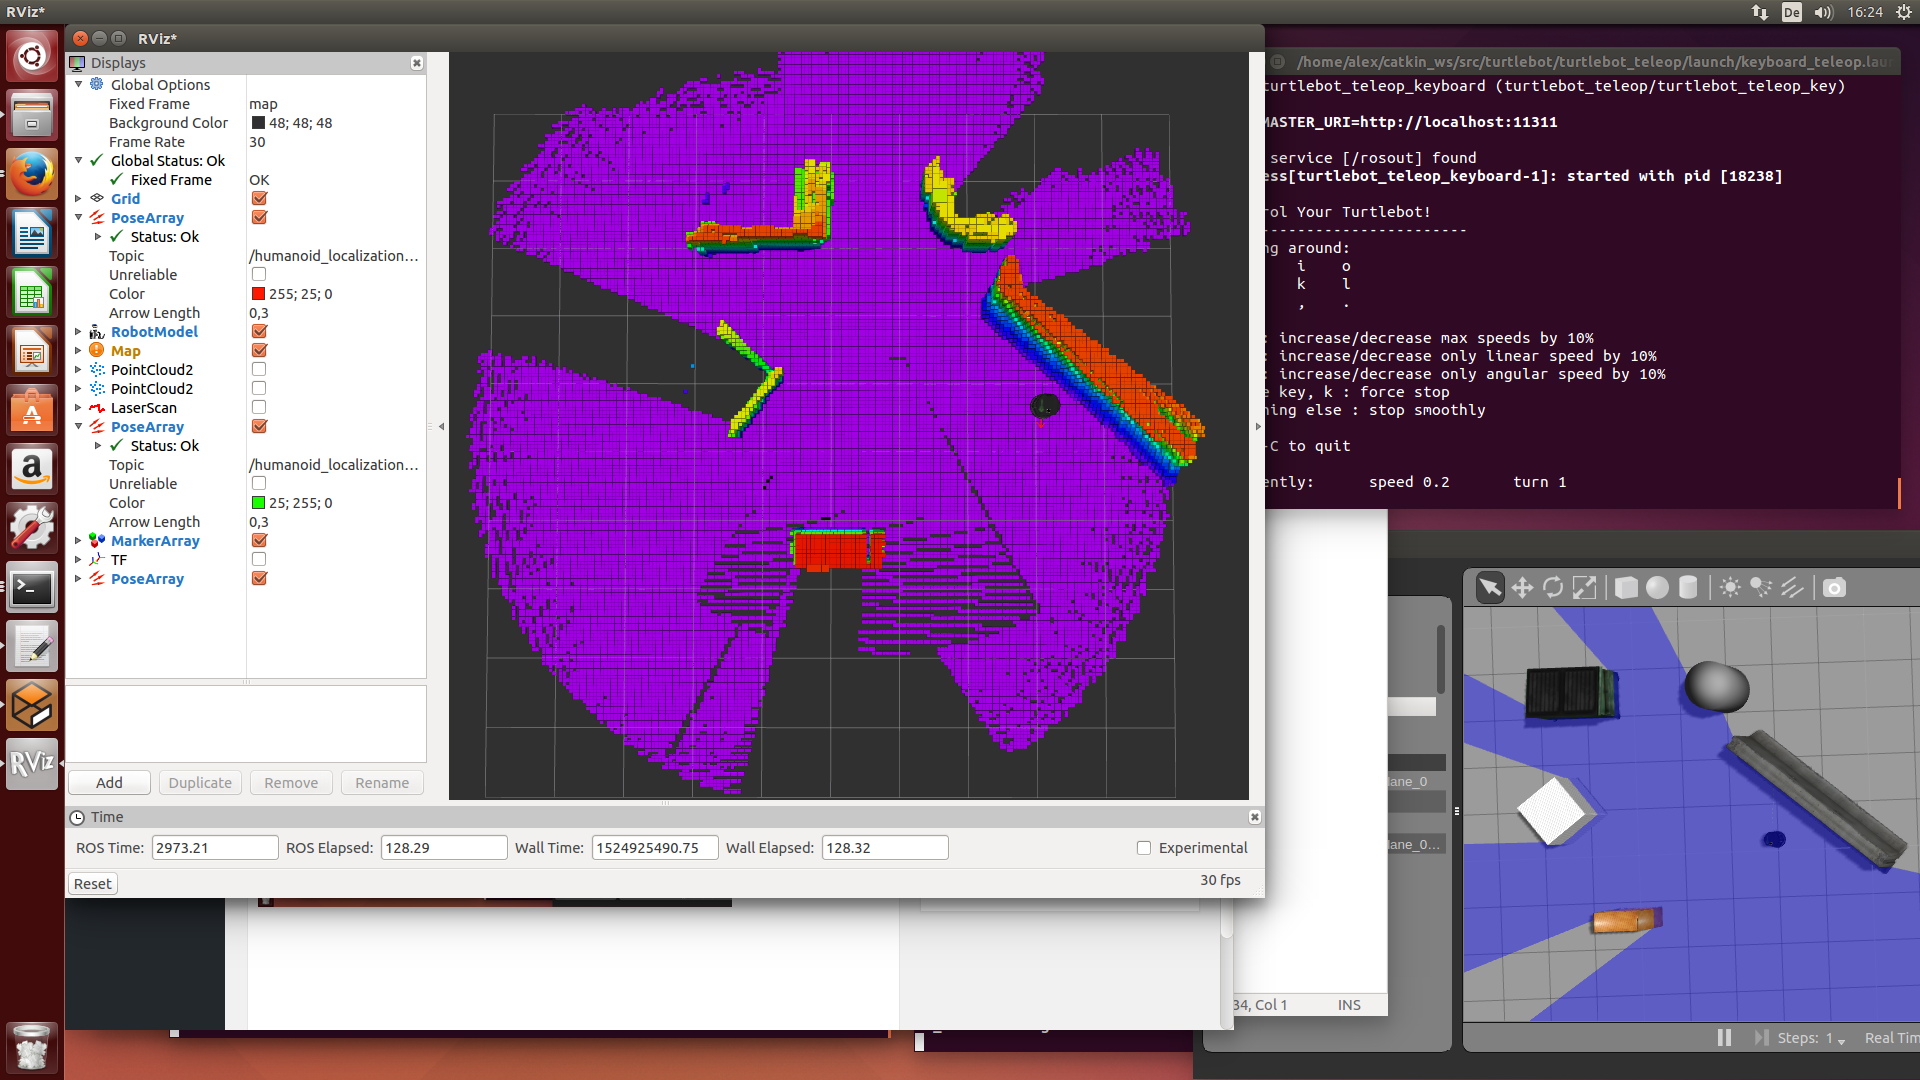
7) Localization in 3D with 360 degree LiDAR
Now we will use the saved 3D map for localization. Run humanoid_localization in terminal:
roslaunch sim humanoid_localization.launch
In RViz make sure Fixed frame is ‘map’.
At first, the particles will be distributed all over the map (global localization):
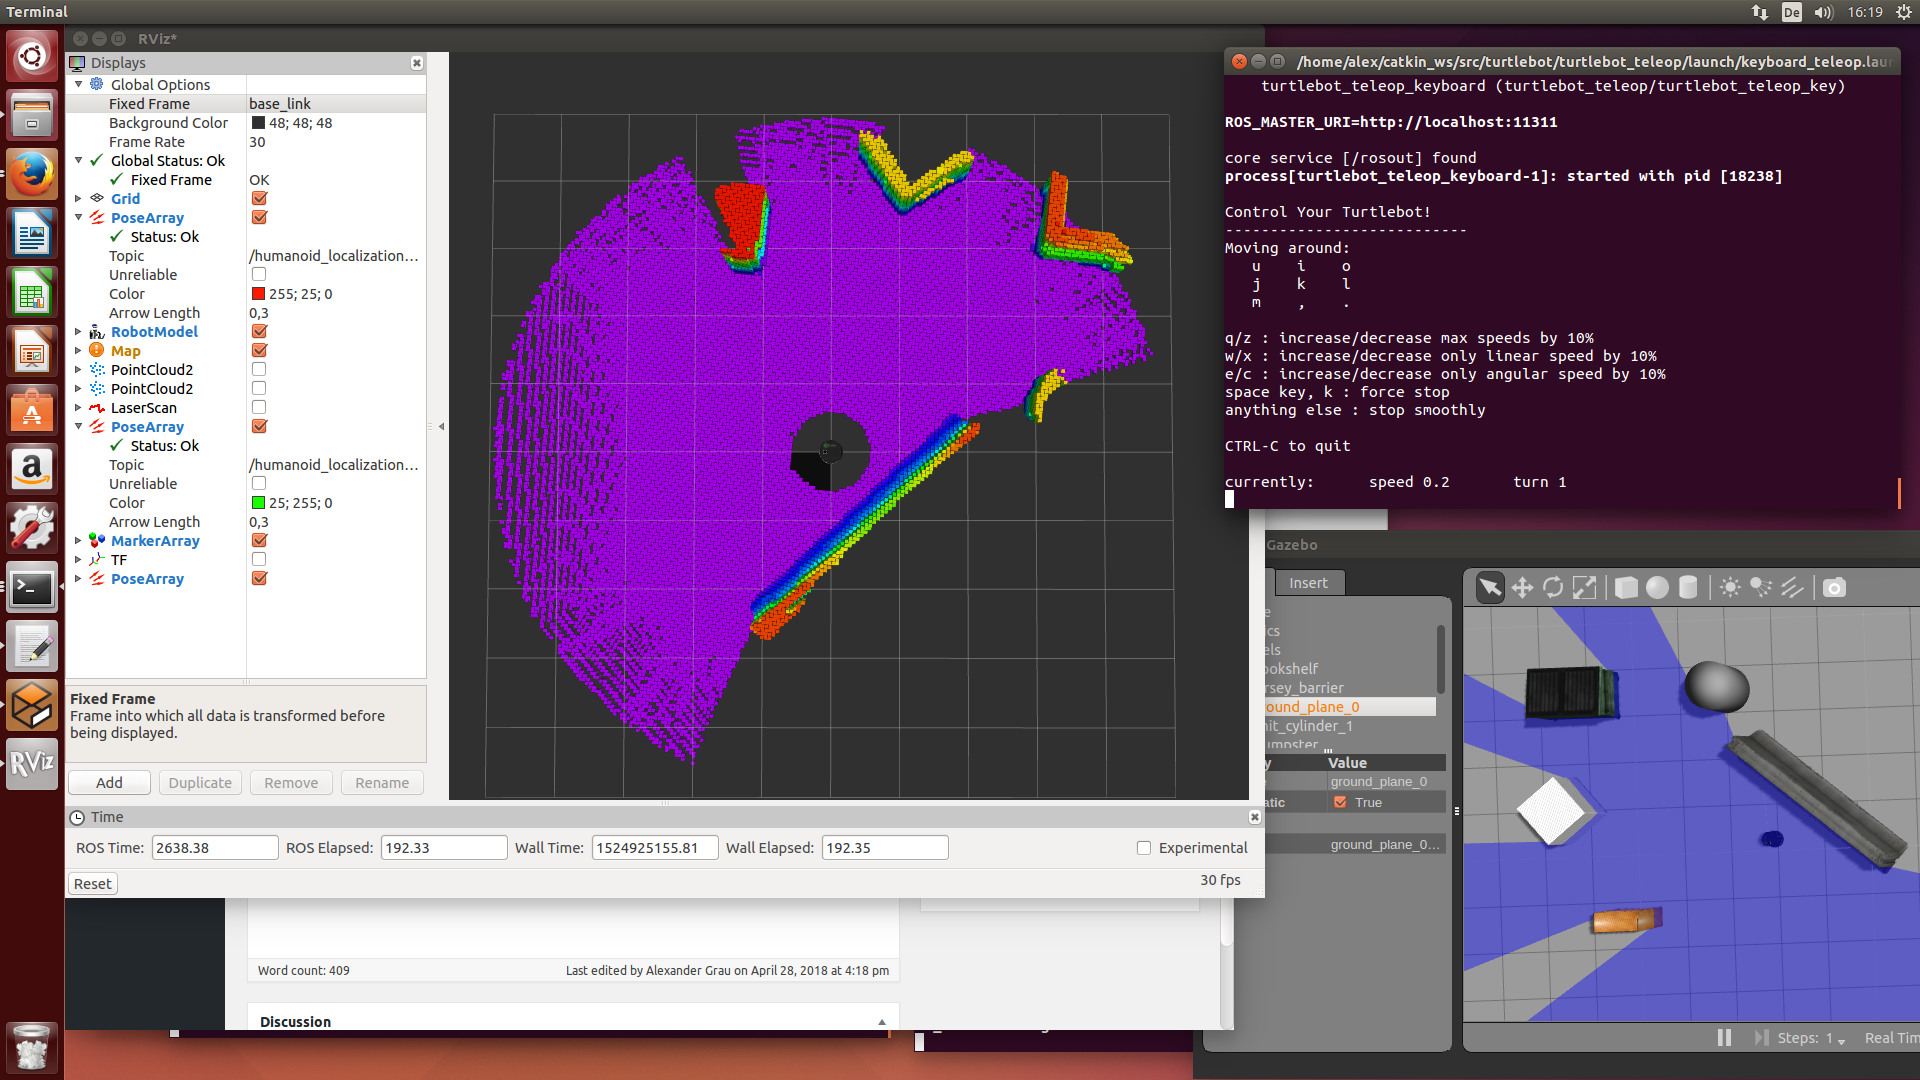
After a short while, the particles that do not match the sensor measurement are gone and the real position is found:
While you steer the robot around, new particles should be added to the existing particles to filter out the real position.
8) Localization and mapping with a non-flat ground
Until now we used a flat ground for the robot. If you want experiment with an height map as ground, edit the file ‘catkin_ws/src/sim/turtlebot_world.launch’ and change the line for the world:
<arg name=”world_file” default=”$(find sim)/world/playground.world”/>
Now restart gazebo with turtlebot (use CTRL+C to stop it). Use octomap to generate the new 3D map, save it, and finally try out humanoid_localization to localize within the saved map.

9) Making the transition to the real robot with real sensors
After your ideas are working in simulation, you can go on with the real robot with real sensors. You can use the same launch files:
- Add nodes to the launch files for your real sensors (you will have to find ROS sensor packages for your sensors)
- Adjust the frame IDs and remap statements in the launch files, so the sensor data (point cloud, laser, IMU) gets into the correct ROS topics
Some notes for different real sensors:
tango_ros_streamer: for octomap_server, set ‘frame_id=/start_of_service’ and ‘cloud_in=/tango/point_cloud’ – for rviz, choose ‘fixed_frame=/start_of_service’
10) Write a robot move controller
Using Python you can write a controller to move your robot automatically within the simulated (or real) world. In the example below, the user can define a perimeter in the world and that perimeter will become the working area for the robot.
Download Python code : control.zip